Scanely documentation
Create and manage your Pages
Build a menu, offer, event or business page. Publish it with a link and QR code, then keep the content up to date from your dashboard.
Updated October 1, 2026
1. Choose a template and create a draft
Scanely hosts your page, so you do not need a separate website. Pages adapt to phones, tablets and desktop screens.
On the welcome screen, choose Create a page + QR, or start with Menu, Event or Offer. Choose Use an existing link when you already have a website or another destination. If you selected a Page template before signing in, you can continue with that template after authentication.
Already have a page? Learn how to reuse it as a template, follow up on submissions or understand visitor actions.
- Open Pages in your dashboard and select New page.
- Browse 15 starting templates across Restaurant menu, Offer, Event & RSVP, Business page, Reviews & feedback, and Simple page.
- Open a preview to inspect the mobile and desktop layouts. Select Use template to create a draft.
- Give the page a recognizable name and start editing.
All starting templates are available on Free. Creating a draft uses one of your account’s shared Pages and QR code slots. Previewing templates does not use a slot. A draft is not public until you publish it.
Client workspace users should select the intended workspace first. Editing requires owner or editor access; allowances come from the workspace owner’s plan.
2. Make the content yours
Templates include sample content. Check business names, photos, contact details, button destinations, prices, event dates and venues before publishing.
- Header and text: introduce the page and explain what visitors should do next.
- Menu: edit section names, dishes, descriptions and prices. Mark unavailable items as sold out.
- Images: replace sample photos with your own and add useful descriptions. Photo limits include header, menu-item and image-block photos, including sample photos.
- Buttons and contact details: add destinations, phone, email, website, address and opening hours as appropriate.
- Form: collect an enquiry, RSVP reply or private feedback. A page supports one form.
- File: paid plans, including Lifetime, can add one file block for a PDF or supported image, up to 5 MB per file.
Add and reorder blocks in the editor to put the most useful content first. Select Save draft to keep unpublished work. Changes are not saved automatically.
Page photos accept JPEG, PNG, WebP and GIF. File blocks accept those image formats and PDF. An empty image block has no public placeholder; choose a photo if you want it to appear.
3. Customize the design
Switch themes in the Pages editor and watch the live phone preview update. You can also adjust the accent, layout, typography, photo shape, spacing and button style. After publishing a page with a form, find submitted replies in Leads.
Free includes Bistro, Studio and Forest themes and three preset accent colors. Paid plans, including Lifetime, also include Coral, Night, Ticket, Notes and Bold and custom accent, background and text colors. Design controls are available on every plan.
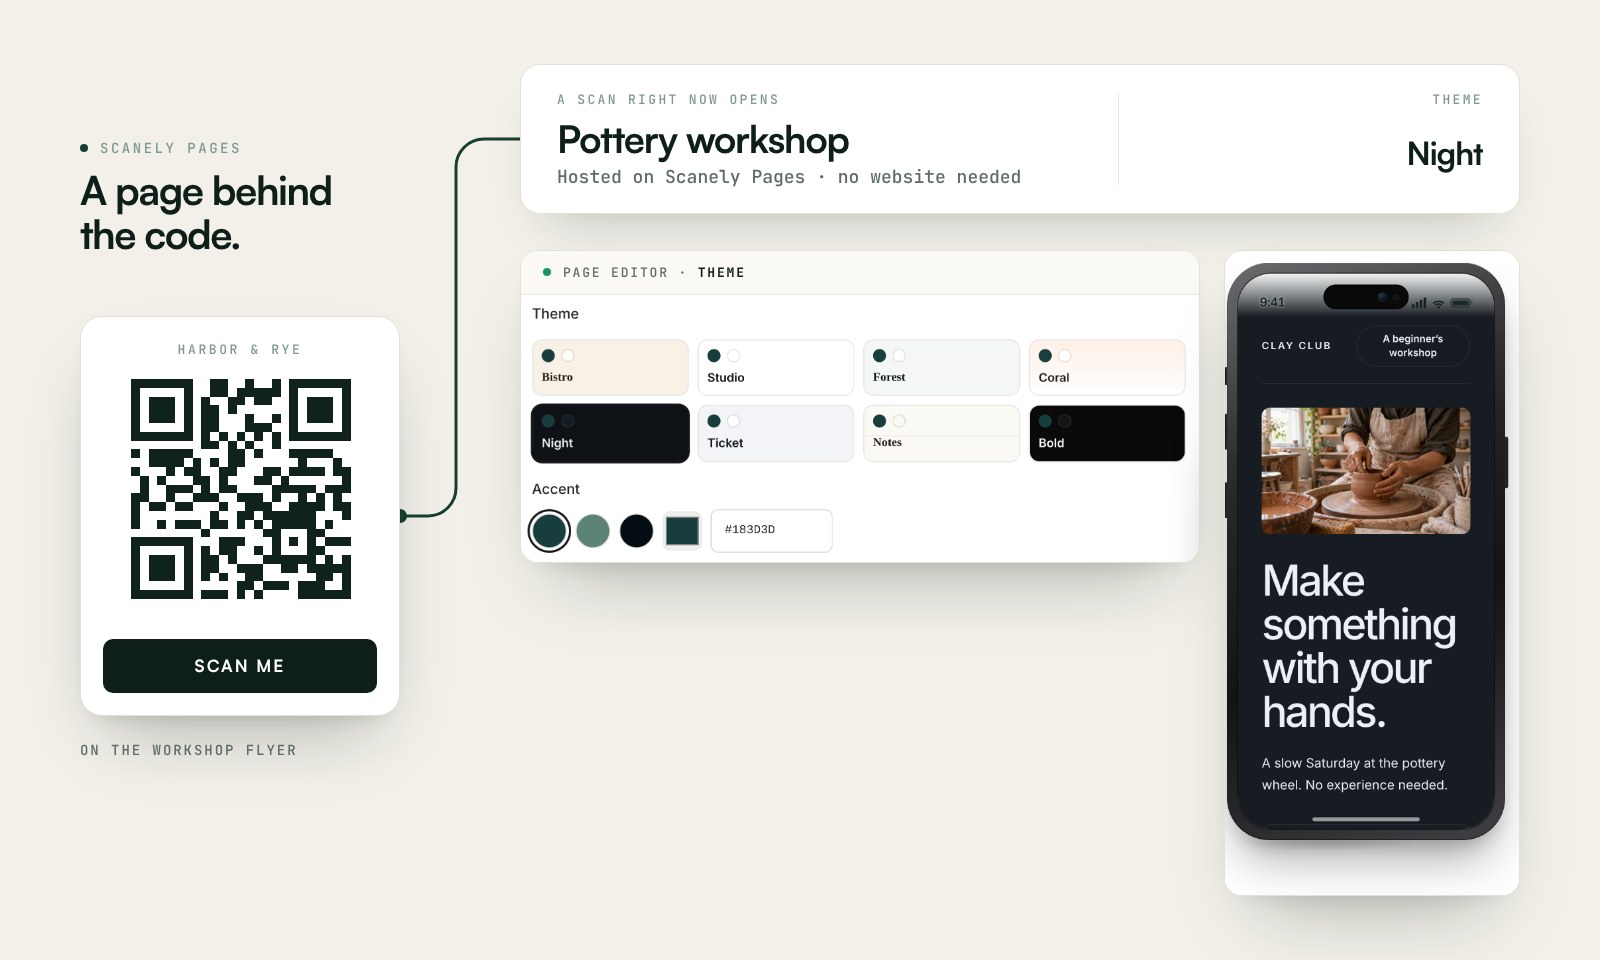
Check contrast and button readability after changing colors. If an account moves to Free, a paid theme falls back to Studio for visitors.
4. Preview and publish
- Review the full page in both mobile and desktop previews. On a narrow screen, use the Edit and Preview controls to switch views.
- Check your content, links, prices, venue and form wording.
- Select Publish page. This saves the current content and makes the page public.
- Select Open page to check the live result. Use Copy link or Download QR when you are ready to share it.
Your page uses a stable Scanely link such as https://scanely.io/r/your-code. Publishing an existing draft does not consume another slot. Hosted Pages are not indexed by search engines; share the link or QR directly.
Update or pause a published page
- Open the page from Pages and edit its content or design.
- Select Save draft to keep your changes private. Visitors continue to see the last published version. The editor preview shows your draft.
- When the revision is ready, select Publish changes. Every QR code linked to this page now uses the new published content, with the same links and printed codes.
- Open or reload the public page to check the result. Someone who already has the page open needs to refresh to see the update.
You do not need to pause a page while preparing a draft. Use Pause page when you want to stop public access. Publishing a new version while paused keeps the page paused; use Resume published page separately when you are ready to resume access.
Changes are not saved automatically. Unsaved work remains only in the editor, which warns before you leave. If another session changes the page first, a conflicting save is blocked. Use Download my draft to keep a copy, then Reload saved draft to review the latest saved version before trying again.
Restore a published version as a draft
Each publication keeps a version of the page's content and design in Version history. Saving a draft does not add a published version. Existing pages start with their previous published content; edits made before version history was introduced cannot be reconstructed.
- Open the page and select Version history.
- Select Preview version beside a publication to review it. Forms and action tracking are disabled in this preview.
- Save any local edits first, then select Restore as draft and confirm. This replaces the current saved draft, so keep any draft content you still need before continuing.
- Review the restored draft in the editor. Select Publish changes only when you want visitors to see it.
Restoring does not change the live page, its links, QR settings, scans or leads. Owners and editors can restore in a writable workspace. Before publishing, the restored content must meet the workspace owner's current plan allowances.
Duplicate a page
Use Duplicate when you want another version to edit now. To keep a starting point for future pages, save your own template.
Select Duplicate on a page card in Pages or in the page editor. Scanely copies the last saved draft, including changes you have not published, and opens a new draft in the same workspace with (copy) added to its name. Owners and editors can duplicate pages.
The copy keeps the content, page design, QR styling, photos and file blocks. Uploaded photos and files belong to the new page independently. Password protection is retained if the original page uses it.
Each copy starts unpublished and inactive, with its own link and QR code. Previous scans, leads and analytics history are not copied. Edit the draft, check its content and publish it when ready. Editing or publishing the copy leaves the original page unchanged.
Every copy uses another shared Pages and QR code slot, including while it is a draft. The workspace owner's current plan must support the saved page's theme, colors, photos and file blocks.
Save and reuse your own page templates
Keep a reusable starting point for recurring events, seasonal menus or similar offers. A saved template appears in My templates; it creates a new page only when you select Use template.
- Open a page and select Save draft to keep its latest changes. You do not need to publish them to save a template. Wait for any upload, save or publication to finish.
- Select Save as template, give it a name and select Save template.
- Open New page, choose My templates and preview a saved template.
- Select Use template to create an independent, unpublished draft. Review the content before publishing.
A saved template keeps the page's content, layout, design, photos and file blocks. Uploaded photos and files are copied independently: later changes to the source page or another page created from the template do not change the saved template.
Templates belong to the selected personal or client workspace. Owners and editors can save and use them; viewers can browse previews. Each workspace can keep up to 50 saved page templates. Saving a template does not use a Pages and QR code slot. Using one creates a draft that uses a shared account slot.
Visitor data, publishing settings, QR styling and password protection are not part of a saved page template. Configure any required access protection for the new draft before publishing. The workspace owner's current plan must support the saved theme, colors, photos and files.
Collect enquiries, RSVPs and feedback
Add or enable a form block. Email and consent are required. You can make the name optional, add an optional phone field, and show or require a message field. Edit the form heading, introduction, field labels, consent text and success message to explain what happens next.
You can read submissions on every plan. Use Leads to track follow-ups with statuses and internal notes.
Open QR design & scan details from the editor to manage the lead email notification setting. Notifications go to the page owner's account email.
Monthly form allowances are shared across all the owner’s pages and workspaces. At the limit, new submissions pause until the next calendar month or an upgrade. Visitors see a paused notice, while the rest of the page remains available. Existing leads remain in the inbox.
Public reviews and private feedback
In a Reviews template, add your Google review link or another public review URL in the Buttons block. The public review button stays hidden until it has a destination. The private feedback form sends responses to Scanely Leads; it does not publish them as public reviews.
Follow up on submissions in Leads
- Open Leads for submissions from every page in the selected workspace. For one page, open it and choose its Leads tab.
- Filter by status or page, or enter a sender's name, email or message text and select Search. The page-specific inbox already limits results to that page.
- Open a submission, choose New, In progress or Closed, and add an internal note of up to 1,000 characters. Select Save changes.
Internal notes are visible to people with access to the workspace and are never sent to the submitter. In a writable workspace, owners and editors can update statuses and notes; viewers can read them. Changing a status does not send a reply.
Each submission also shows its QR placement, so you can tell which link was used when the same page has several codes. This identifies the link, not the visitor's physical location.
Unsaved submission edits stay open until you save or discard them. If another person changes the submission first, your save is blocked to protect their changes. Copy any text you want to keep, then discard your edits and reopen the submission to review the latest version.
Export all submissions or just the matches
Paid plans, including Lifetime, provide Export all CSV for every submission in the current workspace or page, regardless of filters. Apply a filter to show Export filtered CSV, which includes all matches across every results page. Both exports include statuses, internal notes and QR placement.
Use one page with multiple QR codes
Give a counter card, window poster and printed flyer their own QR codes while keeping one shared page. Update the page once, publish the changes and all linked codes show that version. Use separate codes when you want to compare where visits and responses came from.
- Publish your page, then open its QR codes tab. The original QR keeps its existing link and history.
- Select Add QR code, give the placement a recognizable name such as Front window, and select Create QR code.
- Copy or download that placement's code and use it only in the intended location. Each code has its own short link and scan history.
- Open Analytics to compare placements or inspect one code. Submissions in Leads identify the code through which the visitor responded.
Each additional QR code uses one shared Pages and QR slot. It shares the page's content and published versions; it is not an independent page or a copy. To publish different content, duplicate the page instead.
You can rename or pause an additional code without changing the others. Pausing the original page stops access through every linked code, and the page's password protection applies to all of them. Expiry or a scan limit on the original page can also block all placements. A code that is individually paused stays paused when the page resumes.
Attribution follows the link used, not a physical location check. A copied or forwarded placement link still records activity under that placement.
Understand your Page analytics
Open a page from Pages and choose Analytics. All metrics use the selected period. Free shows the current calendar month; paid plans, including Lifetime, also offer longer and custom date ranges.
All QR codes combines the original code and additional placements. Use the QR code selector to inspect one, or Compare QR placements to compare visits, visits with actions and submissions. Each placement keeps its own scan and action records.
| Metric | What it counts |
|---|---|
| Recorded visits | Recorded openings of the selected Page links in the period, from QR scans or direct link clicks. Repeat openings of the same code from the same IP within one hour are grouped. Opening two different placement links can record two visits. |
| Visits with actions | Recorded visits in the selected period with at least one tracked action during that period. Each visit counts once, even when it includes several actions. |
| Form submissions | Successfully stored submissions received in the selected period. One visitor can submit more than once. |
| Visitor conversion | Recognized visitors whose recorded visit was followed by a form submission in the selected period, divided by all recognized visitors with a recorded visit in that period. Repeat submissions by the same recognized visitor count once toward conversion. |
Visitor recognition is estimated from hashed IP addresses. People sharing a connection can be grouped together, and changing connections can affect the estimate.
Read the action breakdown
The breakdown shows clicks on links, phone numbers, email addresses, directions, files, review links and form buttons. Each action type counts once per recorded visit; multiple buttons of the same type are combined. Share is the percentage of recorded visits with that action. One visit can include several types, so their percentages can total more than 100%.
Clicks show intent. They do not prove that a call connected, a file finished downloading, a review was posted or a booking was completed. Clicked a form button means the visitor used a button to reach the form. A visitor can also scroll to the form and submit without clicking that button.
The report shows the UTC date when action tracking started. Visits from before that date have no action history; action counts are not backfilled from historical scan totals. Editor and template previews are excluded. Blocked scripts may prevent an action from being recorded.
Recorded visits use your account's scan allowance. Reaching that allowance stops recording additional visits and their actions while the page remains available. Form submissions have a separate allowance. See Plans and allowances.
Plans and allowances
Pages and other dynamic QR codes share the account owner’s slot allowance across workspaces. Drafts, paused pages and each additional placement QR count. Saving a revision or publishing another version of the same page does not use another slot. The form-submission allowance resets each UTC calendar month.
| Plan | Shared Pages & QR slots | Leads / month | Photos / page | Per uploaded photo |
|---|---|---|---|---|
| Free | 3 | 10 | 2 | 1 MB |
| Starter | 50 | 100 | 8 | 2 MB |
| Pro | 500 | 1,000 | 8 | 2 MB |
| Business | Unlimited | Unlimited | 8 | 2 MB |
| Lifetime Starter | 50 | 1,000 | 8 | 2 MB |
| Lifetime Pro | 100 | 1,000 | 8 | 2 MB |
| Lifetime Business | Unlimited | 1,000 | 8 | 2 MB |
Free: all 15 templates, three themes, preset accents, design controls and a Scanely footer. The brief Scanely screen used for Free URL redirects is not shown before a hosted Page.
Every paid plan, including Lifetime: all eight themes, custom colors, file blocks up to 5 MB, lead CSV export and no Scanely footer. Lifetime includes these Page files; separate hosted File / PDF QR codes have different subscription requirements.
Reaching the monthly scan-tracking allowance stops additional scans being recorded, rather than taking the page offline. The lead allowance is separate and can pause new form submissions. Explicit pause, expiry and per-code maximum-scan settings can still stop access.
When something needs attention
I cannot create another page
Check the shared slot allowance. Existing QR codes, drafts, paused pages and duplicates count too. Choose a plan with more slots if you need to keep them all.
I cannot duplicate a page after changing plans
Duplication checks the last saved version against the current plan. A saved paid theme, custom colors, file block or photos above the current allowance can prevent a copy from being created. The error explains what needs attention; Scanely does not silently remove that content. Choose a plan that supports the saved page, or adjust the page to the current allowances and save it before trying again. A fallback theme shown to visitors after a downgrade does not convert the saved design.
I cannot save or use one of My templates
Save outstanding page edits and wait for any upload or save to finish. Check that you have owner or editor access in a writable workspace. Saving another template requires fewer than 50 saved templates; this cap does not prevent using one you already saved. Using a template requires an available shared Pages and QR slot. Both actions check that the current plan supports the stored theme, colors, photos and file blocks. A plan downgrade does not rewrite the stored template. If a save reports an uncertain result, check My templates or Pages before trying again.
My page does not open for visitors
Check that the original page is published and marked Live. On its QR detail screen, also check password protection, expiry and any maximum scan count. For an additional code, check its own status and limits as well. A draft preview is not the public link.
Visitors still see the previous content
Save draft keeps edits private. Select Publish changes when ready, then reload the public link. Publishing while the page is paused does not resume public access.
My photo will not upload
Check its format, file size and the page’s photo count. Sample photos also count. Replace an existing photo when you want to change it without adding another photo placement.
The form is paused or a lead email is missing
Check the account-wide lead allowance in the editor or Leads inbox. For a missing email, first check whether the submission appears in Leads, then check the page’s lead email setting and the owner’s spam folder. Lead emails go to the page owner, not the visitor.
For more help, contact Scanely with the page name and the error you see. Keep passwords and customer lead details out of your message.